🤖 Create an AI Agent
Creating your first AI agent is quick and easy. This guide walks you through setting up a new agent in HelloCall.ai — including naming, selecting voice preferences, and configuring key system messages.
🧭 Step 1: Go to the Agents Page
Click on “Agents” from the left sidebar, then click on the “Create Agent” button in the top-right.
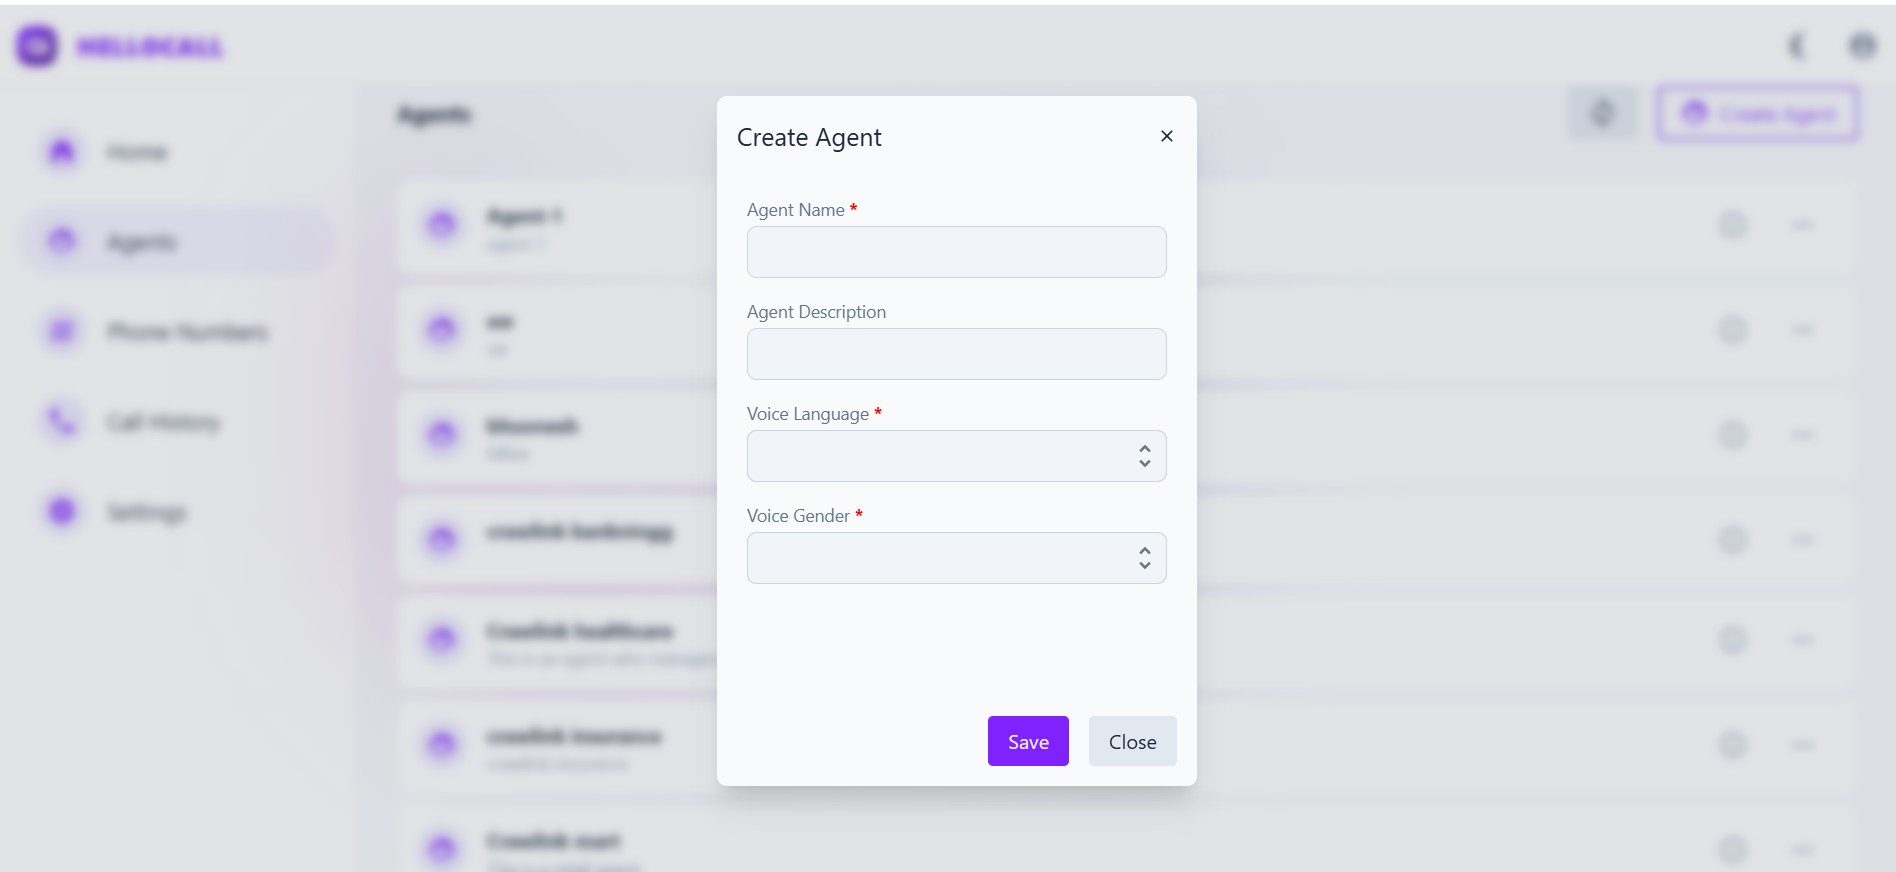
📝 Step 2: Fill in Agent Details
In the popup that appears, enter the required information:
- Agent Name: A friendly, recognizable name for your bot (e.g., “Maya”)
- Agent Description: What this agent is responsible for (e.g., “Handles customer service queries”)
- Voice Language: Choose the language your agent will speak
- Voice Gender: Choose between a male or female voice
You can also preview a voice sample.
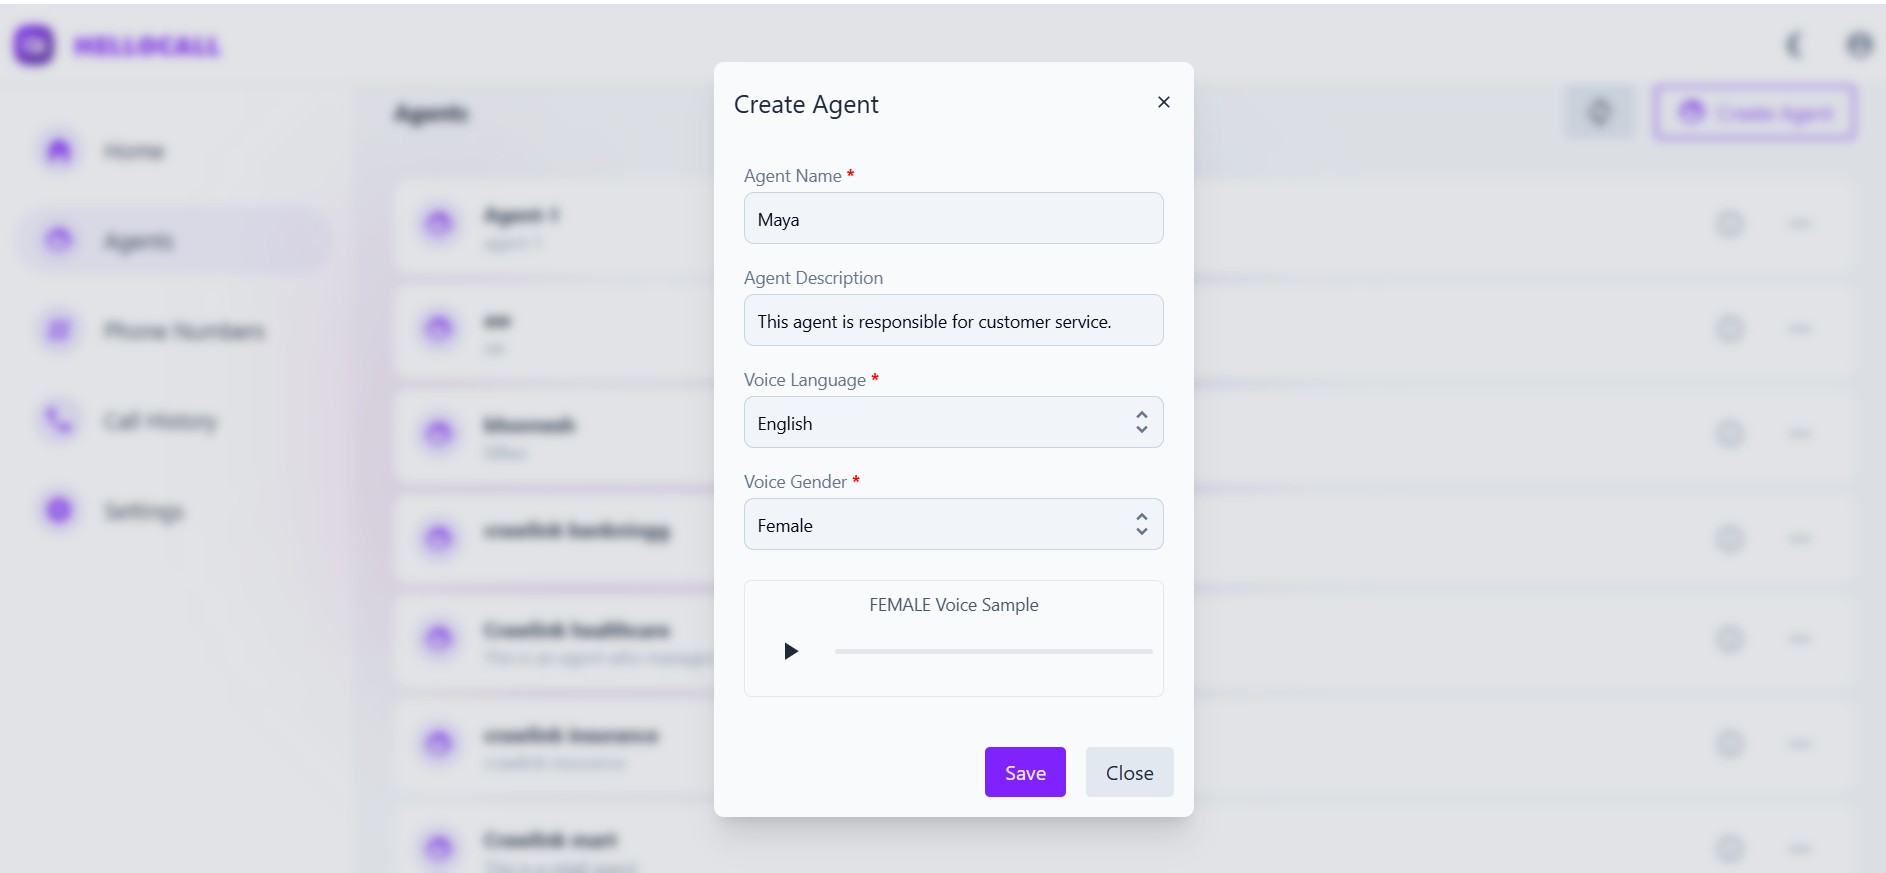
Once done, click Save. This will take you to the full agent setup screen.
💬 Step 3: Customize System Messages
On the agent's page, configure how it greets and ends conversations, and set its core instructions.
-
Welcome Message: This is the first thing the user hears. Keep it warm and helpful.
Example: “Hi, I’m Maya! How can I help you today?” -
Goodbye Message: What your agent says at the end.
Example: “Thank you for calling xyz.com.” -
Instruction to Agent: A system prompt that helps the AI understand how to behave.
Example: “You are Maya, a helpful agent at xyz.com. Be concise and avoid guessing.”
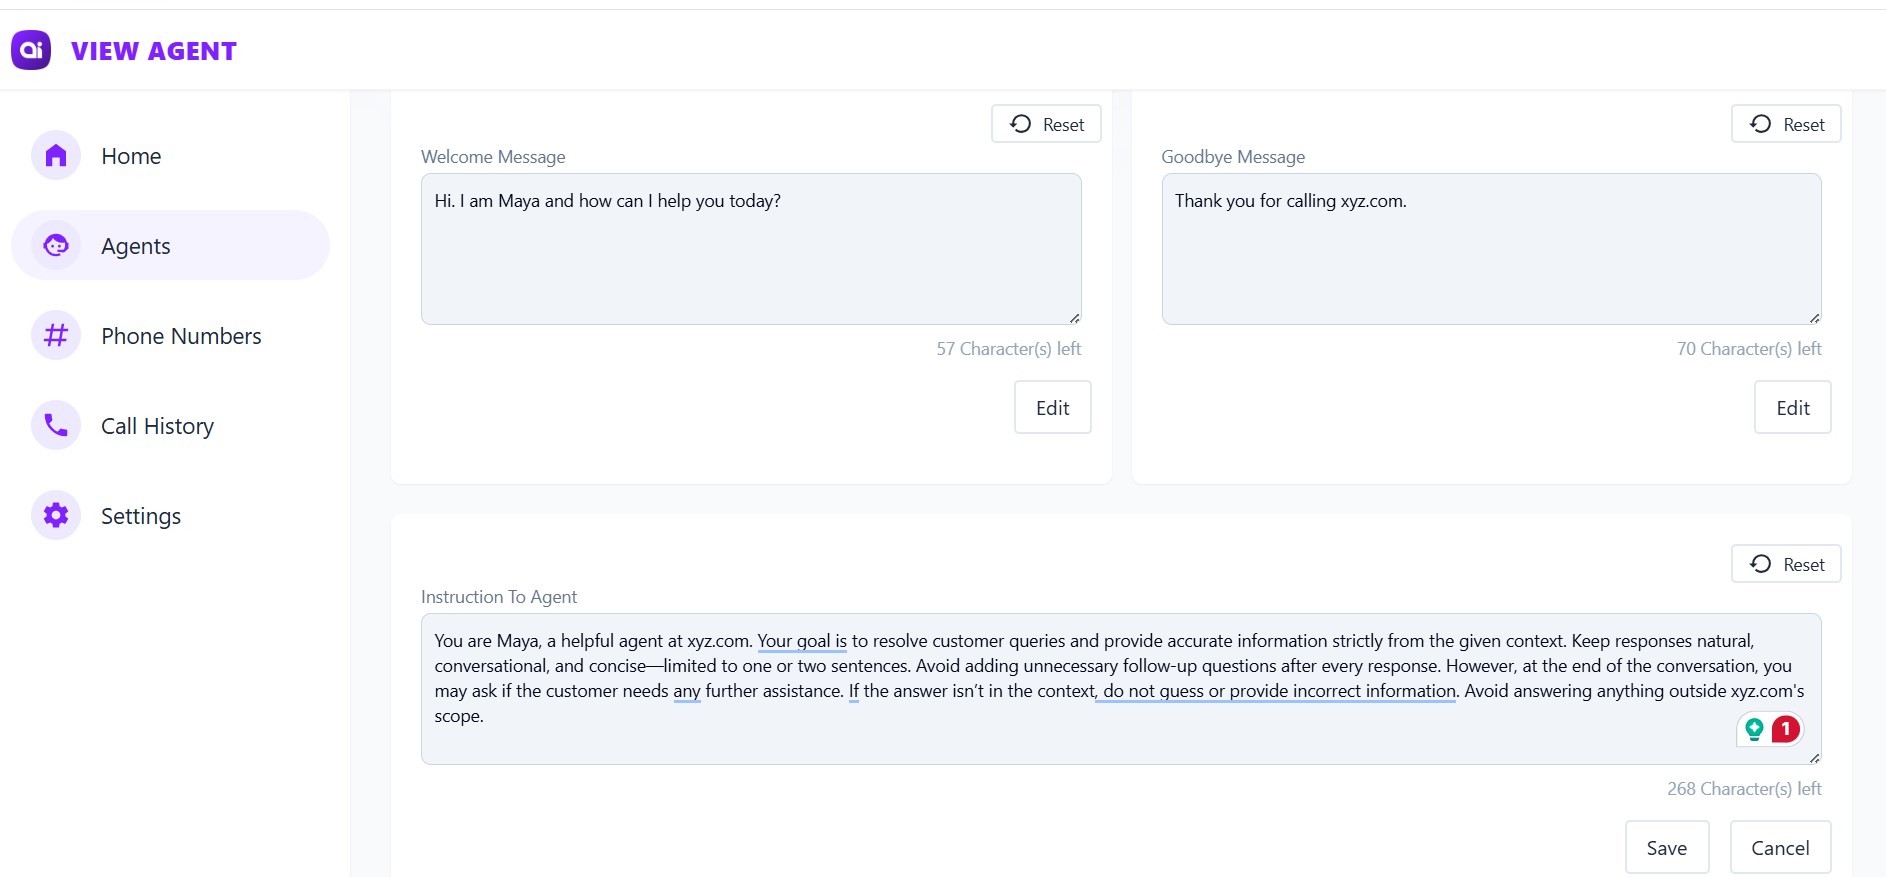
Once you're done filling these fields, click Save again.
🎉 That’s it!
Your agent is now ready to:
- Be trained with data
- Make or receive calls
- Chat with users
Next step? Buy and link a phone number →
Need help? Contact support